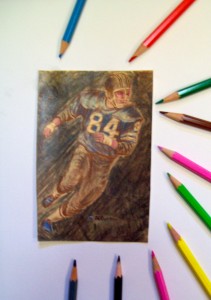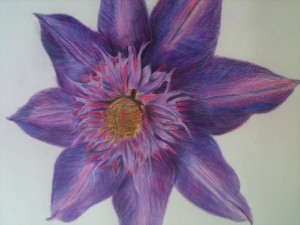
As far as art mediums go, colored pencils are a relatively recent innovation. Because of their waxy nature they retain their own distinct colors when drawn over each other. Unlike pastels, they cannot be blended. However, you can build up layers of crosshatching to produce an “optical mix” of color. This gives a visual effect which appears that the colors have blended.
Colored pencil lead (which actually does not contain lead) is made up of a pigment, a gum binder, a chalk or clay filler that gives the pencil its body, and wax. Without the wax the pencil mark would not stick to the paper. It is also what gives the lead a smooth texture.
Colored pencils are basically waterproof, but there is also a class of them that are water soluble. With these you can use along with a brush and lay water down over your drawing and manipulate it like a water color. You can also dip the point of the pencil in water and get soft, feathery lines.

Tip~There are several brands of colored pencils. Experiment with them until you find the one that works best for you. However, remember some cheaper grades will not give you the richness of color that some better quality grades offer.
Tip~You can use almost anything as a substrate (drawing or painting surface). It is almost as if your imagination is the only thing holding you back. The question is: how long do I want it to last? If you select paper make sure it is acid free with a high rag content.
- Drawing paper
- Watercolor paper
- Pastel paper
- Mat board
- Wood
- Illustration board
- Plastic (of all types)
- Anything you can draw or paint on

What else do you need? Actually, the good news is that the tools and accessories needed to complete your colored pencil painting or drawing are simple and inexpensive.
- Drawing board (if using unmounted paper)
- Drafting tape~be sure it is drafting tape and no other because it is less adhesive than masking tape. Tape your paper to a board all around and remove carefully not to tear the picture surface.
- Brushes~I recommend synthetic. You’ll need these if you are painting with water soluble pencils.
- Erasers~There are several that you can use so experiment until you find what works best for you. I personally use a kneadable eraser and an art gum eraser. Remember, a lot of patience is required when using an eraser. You do not want to damage or smudge your painting.
- Shield~This keeps your hand from touching your substrate. I’ve ruined more pictures with hand smudges than almost anything else. I now use a thin Mylar film sheet for protecting my paintings.
- Sandpaper~This is needed to keep your pencils sharpened.
- Pencil sharpener~no recommendations here. I have all types and use them all.
Note: Although we draw or paint with colored pencils, in this post I’ve called drawings paintings.
Who is my favorite colored pencil artist besides my adult grand-daughter Olivia? Author and artist, Bernard Poulin (of course his works are under copyright protection and cannot be shown here).
