An Artist’s Tale

Artist, R. D, Burton

Late this past year, I was fumbling through an old family album and found a black and white photo of my father that someone had taken. It depicted him putting gas in our wood covered panel truck. I estimated the year to be around 1948 or 49.
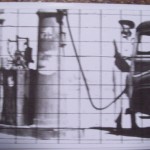
Photo used for painting~grids drawn by artist

After making several thumbnail sketches, I pretty much settled on the composition as it was in the photograph. I added a little to it to show more of the farther away gas pump, and to extend the automobile. This was to bring the main interest, the man, closer to the center of the painting.

After this I searched the internet for colors of the old pumps, I knew they were red but they seemed to be more red-orange. I found a few but not the same style as in the photograph. My determination was to make the painting as realistic as possible.

photo for painting
photo for painting

My technique for creating a realistic painting is after I settle on a composition by drawing several thumbnail sketches, to draw a full scale value drawing. I tend to make this as realistic as possible in an effort to work out a lot of details and problems that might occur in the painting itself. It is almost as if when I draw, I paint in my mind and everything comes to a point of clarity.

In this particular case, I planned the painting to be 24″X36″. This would make a large graphite drawing, but it is what it is…graphiting I did go. Yes, I know there is no such word as graphiting, but this is my tale; therefore, graphiting it is.
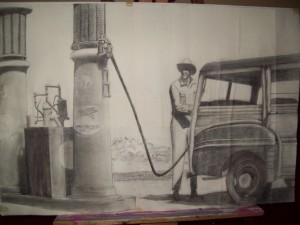
"The Old Woodie" Art Detail
R.D.Burton: Full-Size Pencil art detail of the “Old Woodie”

I back taped together several papers to make a 24″X36″ drawing. After this I made some color schemes of the paintings with gouache. I was not concerned about them being realistic; in fact, one was totally abstract. If I knew I was going to post this blog in the future, I would have held onto them for reference. However, I did not think of it at the time and they ended up being thrown away.

The Idea for the small color schemes of the picture in color was to determine whether the colors worked together and would the overall effect be pleasing. I left them on the wall for about three weeks. I didn’t try to study or critique them, but after passing by them for a while, I finally determined they would work.
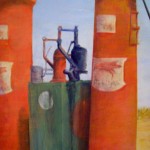
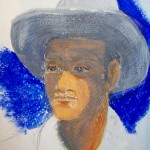
practice color sketch
practice sketch
practice sketch

Next I did some color sketches in acrylic (the medium I was going to use for the painting). Some worked well and others not so much. I was never pleased with the face painting of my father. The photograph didn’t show any details and I kept trying to work off of other photos. The one in the actual finished painting came closer than most that I practiced. I’m still not totally satisfied; however, it is just a painting of a man filling up a gas tank when all is said and done.
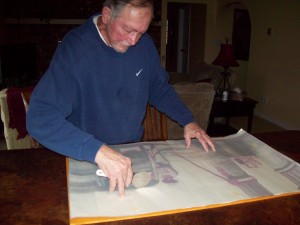
Transferring the drawing to the substrate

Next, I transferred the drawing. Using tracing paper I copied the drawing, with graphite on the back and using a pizza cutter I went over the lines pressing the image to a yellow-ochre covered 1/4″ thick board (see picture at top left). After this I went over the lines with a neutral gray acrylic paint.

After painting in the sky and ground, I painted the man. I did this because he was the focal point of interest in the painting. Right, or wrong, I decided to not follow the value drawing as strictly as I ordinarily do. I drew the values based on a photograph that was over sixty years old and it was not only faded but somewhat unfocused. The shadows seemed way to strong beneath the hat and automobile. I also changed the hat to a Stetson western hat. Many people in New Mexico in those days wore white Stetsons and my dad had one and so it became the one in the picture.
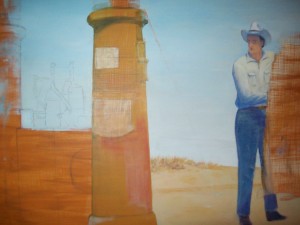
focal point painting

The reason I wanted to paint the main focal point first is because everything works around the focal point, the value, the color scheme, and it helps to solidify the composition.

From here the painting took on a personality of its own. Each day I worked on it, I started by sanding down the previous work and continued painting an inch at a time.

This is the technique I use for all my realistic paintings. My palette was simple. White, red, yellow, blue, , dioxidine-purple, and black. I used both cool and warm primary colors. After applying four coats of satin varnish, I framed the painting. It now hangs on the wall.

R. D. Burton: "Old Woodie" (2012)
R. D. Burton: “Old Woodie” (2012)


Posted in artists technique, painting, R. D. Burton, realistic painting | Tagged , , , , , , , | Comments Off on An Artist’s Tale

Tips for Pricing Your Art

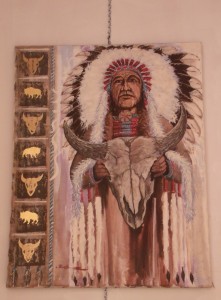
Lynn Burton: Chief and Skull (oil on Canvas)

One of the toughest choices you make as an artist is how to set a price on your work. It depends on so many factors that need to be considered:

  • The popularity of the art.
  • The medium used.
  • The complexity and quality.
  •  What the buyer is willing to pay.

Some artists determine the true cost of materials, the amount of “man/woman” hours put into the painting, complexity, size, medium, and any other thing that could be considered. If sold through a gallery, they double this figure and settle on an amount.

Remember, as an artist, if you choose to self promote and do not use a gallery, you need to use the same percentage markup you would give the gallery because acting as your own intermediary will require about the same expense (cost of promotion, time lost from painting, etc.). Here are a few tips to consider when pricing your art.

R. D. Burton Painting: The Red Truck
R. D. Burton Painting: “The Red Truck”
  • Know your market. Search on-line and visit galleries to find art that is similar in quality, size and medium used to your own work
  • Medium matters~Generally an oil is valued higher than a water based painting.
  • If framed, be sure to double the price of the frame to the gallery so you get one hundred per-cent of the frame cost back. Add this to the price per square inch of the painting.
  • Set a subjective value. Instinctively, what is your painting worth? What amount would convince you to part with it?
  • Consider adjusting price of your art up or down based on its commercial appeal. Is it in a style, technique and composition of what is appealing and popular?
  • Is it executed well? Will other artists respect your work?
  • Consider the above factors and determine a price per square inch for your painting. For example a 24″X36″=864 sq. inch. Lets say that after considering the information above you determine the selling price should be $1.85/sq.inch, and it has a $150.00 frame on it then the price the gallery should sell it for is $1900.00. This gives you $800.00 plus the $150.00 cost of your frame back.
Posted in art, art information, art pricing | Tagged , , , , | Comments Off on Tips for Pricing Your Art

So…You Want to be an Art Critic?

So, you decided to be an art critic. You went to college and studied art history. You are a skilled writer and have spent a good deal of time familiarizing yourself with the art scene. You recognize there is a love-hate relationship between critics and artists and are ready to go willingly into the eye of the storm.

You are doing everything right. You are being patient. You are getting to know some art critics. In other words, you are emerging yourself and getting involved, visiting exhibits, interviewing unknown and semi-known artists and trying to get assignments at your local papers, but getting no takers. It will come, you keep telling yourself. However, all your articles written are in the trash.

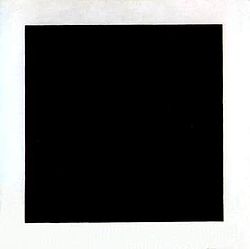
And then it happens! You get an assignment from a rather obscure regional art magazine. Your assignment: Write a review on an exhibit of a new artist making inroads in a “new” art movement that is getting some “buzz” in the art world. Assume the year is 1913 and the artist you are going to critique is Kazimer Malevich. What are you going to write in your review when you critique his work: Black Square on a White Field?Kazimer Malevich Black Square on a White field

Posted in art, Art critic, Kazimer Malevich | Tagged , , , , | Comments Off on So…You Want to be an Art Critic?

Who and What Inspired Wassily Kandinsky?

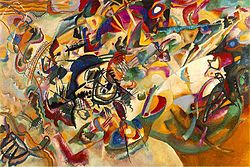
Wassily Kandinsky: "Composition VII" (1913)
Wassily Kandinsky: “Composition VII” (1913)

Wassily Kandinsky was a brilliant, well educated student of life. In 1896, at the age of 30, he was pursuing a promising career as a law and economics instructor. Fortunately for the world of art and all future artist he made a passionate and major career change at this time of his life. He decided to seek a life of art.

His inspiration came after seeing an exhibit by Claude Monet of his Haystack series. Kandinsky became especially concerned about the paintings on exhibit.

Claude Monet: “Haystacks (sunset)” 1890

He had to read the catalog to know that what he was staring at with such confusion and interest were paintings of haystacks. The impressionistic style of Monet’s paintings took him aback and confused him. He felt that Monet had no right to paint indistinctly and felt pained at the non-recognition of the point of interest, feeling it was missing.

However, the color work in the series of paintings not only impressed him but near haunted him. It seemed completely independent of the objects themselves. He wrote about the experience later, proclaiming: I noticed with surprise and confusion that the picture not only gripped me, but impressed itself ineradicably on my memory.

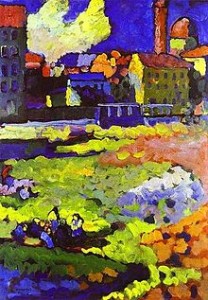
Wassily Kandinsky: Munich-Schwabing with the Church of St. Ursula (1908)

In my personal opinion, Kandinsky’s painting, “Composition VII” (seen above on the left) was the finest abstract work of art that exists. It is considered by many to be the first truly abstract work of art.

All artists have that one something that inspires them. The color work and freedom of artistic expression in “Composition VII” does (in the words of Kandinsky) impress itself ineradicably (unable to be destroyed or removed) on my memory. This tidbit of information may seem strange to those of you who know that I am a realistic artist inspired by such artists as Norman Rockwell, Andrew Wyeth, Edward Hopper, Thomas Hart Benton and Robert Vickrey. I’m passionate about good art no matter what style, technique or “ism” it falls under.

For further discussion on the Abstract art movement, click on the picture to the left.


To shop or purchase Lynn Burton’s art, click on picture below and type Lynn Burton in the search engine>>>>>>

Lynn Burton: Whas...it? In full Color
Lynn Burton: Whas…it? In full Color


Posted in art, Artist, Claude Monet, Wassily Kandinsky | Tagged , , , , , , , | 1 Comment

Tips to Keep Colors Permanent

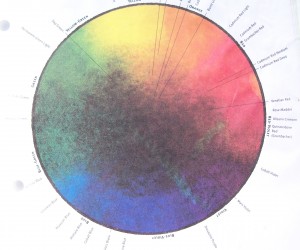
The Munsell Color Wheel
A version of the Munsell Color Wheel

To make sure your art will last as long as it possibly can without fading, it is imperative that you understand the permanence and the lightfastness of the colors used in your artwork.

More than likely, this blog post is for the less experienced wannabee artist rather than the prolific professional who through education and practice has already studied, succeeded and at times failed in the use of most all colors and media. However, it is important enough to discuss.

Lightfastness: It is important that your artwork resist fading in direct sunlight. There are colors and certain media that fare better at this than others.  Using pigments with good permanence ratings can help your artwork from growing faint. Needless to say, it helps if you keep it away from the damaging rays of the sun.

Art Center Information Logo

Colors fade because the suns ultraviolet light breaks down the chain-like color molecules. Oxygen attaches to the molecular fragments creating new molecules that no longer have the same color absorption properties. (That was a mouthful! I’ll try to be simpler.)

Why are ASTM ratings important?

ASTM: American Society for Test Materials.

  • Class I: Very lightfast
  • Class V: Very fugitive (quick to disappear)

For example, consider Alizarin crimson, which is a very popular pigment with many artists. This color has a rating of III or IV and a permanent rate (PR) of 83. This means that it will eventually fade in the damaging UV rays of direct sunlight. As a substitute, I recommend you consider a quinacridone family with a PR in the 200s, or you may want to experiment with other colors to see which works best for you; such as, the pyrole and perylene families. In oil paints, the Windsor red is the same or similar to Pyrole red.

  • Assume paints without ASTM ratings to not be lightfast.
  • Buy paints with ASTM ratings of I or II.

Here is a classroom experiment you may wish to try:

  1. Paint swatches using similar selected colors with different ASTM and PR ratings.
  2. Cut them in half.
  3. Place one half of each in direct sunlight.
  4. Place one half of each in a dark drawer.
  5. After six months compare the lightfastness of the colors.


Posted in art center information, color, Lightfastness, paint, Permanent Rate | Tagged , , , , , , , | Comments Off on Tips to Keep Colors Permanent

Tip for Drawing Figures

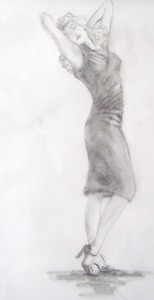
Quick Graphite Sketch For Blog

Here’s a quick sketch I did for the purpose of this blog. I sketched it from other studies I made some years ago from a painting I was attempting and never quite finished.

I don’t think there is an art instructor or book in the world that can teach you about drawing or painting the human figure. There are hundreds of books that teach you the basics but your drawing or painting is yours…and it is at each and every time that you attempt it.

I don’t know, it might be your mood and interpretation at the time. There is an endless variety of poses possible. For example, plan the standing figure carefully. Standing is a static pose, but an artist must suggest that it not only is capable of movement but will probably move very shortly; such as, the pose depicted to the left. Is she going to leave those arms in this position forever. No! There coming down…and soon.

(I remember at the time I first did this, I wasn’t that confident in drawing hands so I hid them in this pose. After a good deal of practice, fortunately, I no longer lack the confidence.)

Only when you draw your figure in a rigid moment do you arrest the latent movement. To relieve that “static” feeling, it helps to put the weight on one leg, twist the torso, tip and turn the head, or allow the figure to lean upon or be supported by something or someone. I go off the rule to not have the face and eyes looking straight–unless the composition requires it.

It is important that we, as artists, do not form a habit of always drawing or painting our figures always the same. A model can sit, lay down, or stand in a thousand different poses. Sketch them all. Someday you will be searching through your files for that one particular pose you need.

Posted in drawing, painting | Tagged , , , , | Comments Off on Tip for Drawing Figures

The Weekly Wrap up~8/13–8/18/2012

Lynn Burton: Parrots
Lynn Burton: Parrots (Oil on canvas)

MONDAY, 8/13: We wrote about composition your artw0rk and discussed:

  • Shape
  • Line
  • Value
  • Color

For full read, click on picture at the right>>>


Art Center Information Logo


TUESDAY, 8/14: We introduced a plan for artists to share their work on our site and be interviewed, hopefully, helping to promote them.

For full read, click on picture at the right>>>


Lynn Burton: Study for Mural (oil on board)


WEDNESDAY, 8/15: In this blog post titled, More About an Artist’s Interviewwe said: In my previous blog, I invited artist and fine art photographers to be interviewed and promoted on this sight. Anyone interested needs to send a private  message to…….

For full read, click on picture at the right>>>


James Frederick: Still Life (Pastel)

THURSDAY, 8/16: In blog post titled, 4 Quick Tips for Still Life Painting, we wrote: When considering a still life, concentrate on these four things

  • Color
  • Edges
  • Overlapping
  • Perspective

For full read, click on picture at the right>>>


R.D. Burton: Knobby Tree (watercolor on paper)
R.D. Burton: Knobby Tree (watercolor on paper)12″X16″


FRIDAY, 8/17: In blog posted, Suggestions for Laying up a Good Watercolor Wash, I wrote: After many unhappy blunders behind me, I learned to fully appreciate the value of laying up a good wash with ease, confidence and speed. I highly recommend……

For full read, click on picture at the right>>>


Miami street scene
Miami street scene

SATURDAY, 8/18: Sometime an artist runs out of ideas. What will I paint next? The fear that there will never be a painting as good as the last always dogs an artist’s mind. It’s called an artist’s block. I posted this under the title, Suggestions~What to Paint Next, and demonstrated to artists where they could find a plethora of information while sharing some pics of my vacation to Miami Beach.


Be sure to sign up for the Art Center Information newsletter and enter the drawing to win a free coffee table art book>>>Upper right hand corner of page.

Check out our Greeeaat Opportunities page at the top.  See  if there is something in it for you.


Posted in art center information, weekly review | Tagged , , , , , , , | Comments Off on The Weekly Wrap up~8/13–8/18/2012

Suggestions~What to Paint Next

Miami street scene
Miami street scene

Sometime an artist runs out of ideas. What will I paint next? The fear that there will never be a painting as good as the last always dogs an artist’s mind. It’s called an artist’s block.

I might suggest you dig through your digital photo library on your computer, or go back to the old photos stuffed in a box in the top or bottom of your closet.

The pictures on this page are from a trip to Miami, Florida a couple of years ago. I took a stroll through a street bizarre. They were selling fruit, drinks, trinkets and there were nearby restaurants set up for service under awnings. I’ve always enjoyed artist depicting scenes such as this, so I snapped a few shots. Within the pics is an arsenal of artistic opportunities.

Miami street scene
Miami street scene


It doesn’t matter whether the photograph is artistically composed correct enough for a painting, , it may be enough for an idea. The artist’s brain will do the rest.

There may only be a tiny section of the picture that is an inspiration. For example, in the pic to the right it might be the shadow of the palm at the bottom that inspires you out of your artist block. It may be the people walking between the exhibits, or it might just be the overall color scheme.

Miami street scene
Miami street scene


Who doesn’t like bicycles? This is why I took the picture in the first place…someday I am certain I will need referral material of a bicycle or group of bicycles. Thank goodness for the digital camera. If I wish, I can crop the picture to show the action and body language of the person in the upper left riding his bicycle.

Miami street scene
Miami street scene


There are tremendous uses for photographs that depict foliage. I always recommend that artists do not use them for color reference because there are to many hue descrepancies that can be interpreted and will not help your painting. However, I do recommend that an artist use them for accuracy in their depiction.

For a further discussion of using a photograph for painting click on picture to the right>>>


Miami street scene
Miami street scene
Miami street scene
Miami street scene


Miami street scene
Miami street scene


Miami street scene
Miami street scene


Miami street scene
Miami street scene
Miami street scene
Miami street scene
Posted in art information, Artist, Photograph | Tagged , , , , , | Comments Off on Suggestions~What to Paint Next

Suggestions for Laying up a Good Watercolor Wash

R.D. Burton: Knobby Tree (watercolor on paper)
R.D. Burton: Knobby Tree (watercolor on paper)12″X16″

After many unhappy blunders behind me, I learned to fully appreciate the value of laying up a good wash with ease, confidence and speed. I highly recommend anyone with doubts in their abilities in this direction put off all other considerations until they acquire these skills. Laying up a good wash is the fundamental operation in watercolor painting.

The good news is that there are no great difficulties in laying a wash. You need to be careful, use common sense, and practice, practice, practice. Just a few hours of concentration on this single object will save weeks of misguided effort and will lay the foundation for technical efficiency.

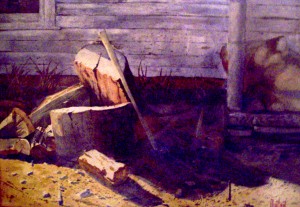
R. D. Burton: Winter Kindling


Flat Wash

  • Mix more required color in a saucer or bowl than you feel you need.
  • Choose paper thick enough to accept the wash so it will not buckle or be uneven.
  • Stretch the paper on a drawing board and secure.
  • Tilt the board at approximately a 30 degree angle.
  • Using a sponge absorbed with perfectly clean water, squeeze out about one-half of it, and pass the sponge lightly over the paper’s surface.
  • Fill a large, wide, flat brush with the medium. When it is fully charged draw it with a long, light, steady and deliberate stroke across the top of the paper. Part of the color will wash down and form a pool at the bottom of the stroke.
  • Charge the brush with medium again and make a second stroke overlapping the first one by about a half of an inch.


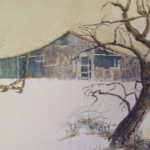
R.D.Burton: "Winter Farm" (watercolor on paper)
R.D.Burton: “Winter Farm” (watercolor on paper)

Gradated Wash (Takes a lot of practice–trust me!)

  • Be sure to be aware of the opacity and transparency of the colors selected for use if using duel gradation technique.
  • Smaller amount of color needed for gradated wash but make certain you have enough.
  • Mix color selected.
  • Make first stroke with the medium charged brush as mentioned above.
  • After first stroke, very quickly, take a brush full of water (dilutes the color) and add it to the mixture for the second stroke.
  • Proceed in this manner down the page–diluting the paint with more water with each stroke.
  • Use as is–or use a duel gradation technique when dry, turn paper over and use a different color doing another gradated wash (this makes great moody skies in landscapes).
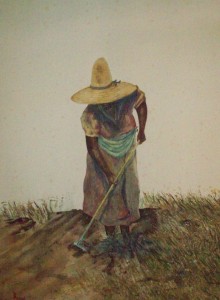
    R.D.Burton: "Woman In The Field" (watercolor)
    R.D.Burton: “Woman In The Field” (watercolor)

    Fun experiment and challenge for the wannabee artist.

  • How to make a midday sky: Using the techniques described above, lay up a wash of very pale vermillion until it gradates to the white of the paper. Let it dry for 24 hours. After this, turn the paper upside down and repeat the gradated process washing it with a medium strength of cobalt blue to nothing.
  • Creating an afterglow: Use same technique as above, but gradate a wash of cerulean blue over a fully dried gradation of yellow-orange mixture.

Be sure you are aware of opacity and transparency of colors especially when washing over one another.


Who (like me) doesn’t want to die as an unknown artist? If you’re interested in finding out more about becoming better known and selling your art work, click on the picture just above, R. D. Burton:”Woman in The Field.”


Posted in art information, flat wash, gradated wash, watercolor | Tagged , , , , , | Comments Off on Suggestions for Laying up a Good Watercolor Wash

4 Quick Tips for Still Life Painting

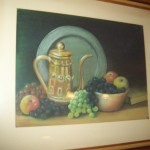
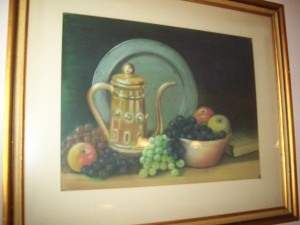
James Frederick: Still Life Pastel

Overlapping edge control is important when giving dimension to a still life. In James Frederick’s painting at the left, the center of interest is not just one object, but an area where most all the objects are clustered next to each other. The two objects outside the bowl add balance to the painting but do not capture the focus.

To show dimension, many of the objects overlap as possible. The edges were softened and less intense colors were used in the background.

When considering a still life, concentrate on these four things.

James Frederick: Still Life (Pastel)
  • Color
  • Edges
  • Overlapping
  • Perspective

To visit other pages discussing artist, James Frederick, click on painting to the right>>>

Subscribe to our newsletter and enter to win a beautiful art coffee table book at the top right of this page.

Be sure to check out the Greeeaat Opportunities page at the top to see if some of the things discussed will help you.

Take time to go to the gallery pages and peruse some of the family’s art. Top of the page.


Posted in art, Still Life | Tagged , , , , , , , , , | Comments Off on 4 Quick Tips for Still Life Painting