Three Tips for Painting Light and Weather

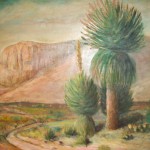
Arlen Burton: "Signal Peak" (Oil on Canvas)
Arlen Burton: “Signal Peak” (Oil on Canvas)

There should be a balanced order of shapes when laying out a landscape composition. I like to carry two “L” shaped pieces of matte board with me at all times. when I see a scene that I think is capable of making a picture I adjust them like a viewfinder, working with them to get the “just right” composition. Then I make a quick sketch of what I am seeing. Later back in the studio I might rearrange, add something in, take something out, and on and on, with dozens of small thumbnail sketches until I capture what I desire. I’m always in quest of the next “masterpiece.”
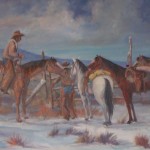
 

Lynn Burton: "Ready to Ride" (oil on canvas)
Lynn Burton: “Ready to Ride” (oil on canvas)

It wasn’t until the eighteenth century that the changing effects of light and weather on a landscape became such a popular subject matter. The definitions of individual features and the length of shadows can dramatically change a scene, so it is always essential that an artist be aware of the passage of the sun.

When you paint weather, such as, rain, snow, or fog, you want it to be as realistic as possible.  You have to realize how light affects these conditions and what it does to the various hues in the painting.  They are all influenced by light deflection.
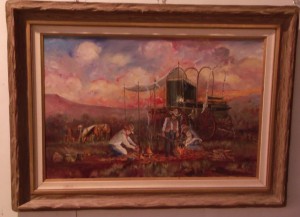
Lynn Burton: "Eating at the Cuckwagon" (Oil on canvas)
Lynn Burton: “Eating at the Cuckwagon” (Oil on canvas)


Here are a few tips to consider when painting light:

  •  At Sunrise: The temperature of the painting becomes warm and not cool. Consider starting with a Cadmium Yellow Light or Lemon Yellow wash
  • At Midday:When the sun is directly overhead, a darker yellow should be dominant throughout the painting. Experiment with this but often yellow ochre and oranges will be a good place to start.
  • 3. Late Afternoon: As the sun falls into the western hemisphere, more oranges and reds and purples are evident. By sunset, the yellow hues have almost vanished.
 

Posted in Light, painting, Weather | Tagged , , , , , , | Comments Off on Three Tips for Painting Light and Weather

Weekly Wrap is in The Can~July16 to July21, 2012

To go directly to the article of a given day, click on the picture to the right of the day description.

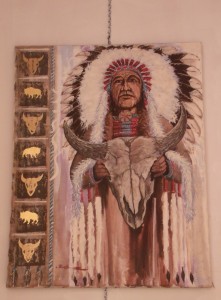
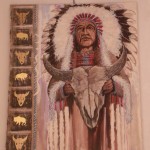
Lynn Burton: Chief and Skull (oil on Canvas)

MONDAY, JULY 16:I had a drawing for the members of my newsletter, did it on a short YouTube video and posted it on the blog. The gift was a fabulous art coffee table book. I’ve selected another gift for new member entrants. (See upper right.)

To watch the video, click here>>>>>>>>>>>>>>>>>>>>>


TUESDAY, JULY 17:
We had no entry on Tuesday


Lynn Burton: Untitled

WEDNESDAY, JULY 18:

We gave you nine important warning tips for painting with oil paint. These are very important. Make sure you know them and work with oil in a healthy manner.


THURSDAY, JULY 19:

Lynn Burton: Untitled
Lynn Burton: Untitled (oil on canvas)

We asked: Why is oil painting so popular? We gave a short but good read about oil painting while accentuating the positive.

We said: With the great many magnificent oil paintings that are hundreds of years old in museums, we know that if properly prepared, oil paintings last …


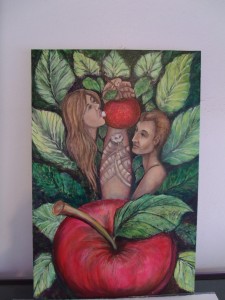
Lynn Burton: "Adam and Eve"
Lynn Burton: “Adam and Eve”

FRIDAY, JULY 20:

In Sticking to the Basics in Oil Painting on Friday we did one for the wannabee oil painter. It’s actually, oil painting 101. We said: You have probably cut into a cream pie where there is a skin formed on the top yet below it is soft pudding. Imagine the same with an oil painting. If the…


Lynn Burton: Untitled
Lynn Burton: Untitled (OIL on canvas)

SATURDAY, JULY21:

In the article entitled: Get to know the Oil Absorption of Your Paint, we gave several pigments and the percent of their oil absorption. The list we created can be very helpful for the oil painting artist, especially the wannabee.


Be sure to sign up for Art Center Information’s newsletter (upper right). There will be a random selection of entrants and one will receive this beautiful (huge) art coffee table book>>>ART: Over 2,500 Works from Cave to Contemporary (Hardcover)~by Andrew Graham-Dixon (Author)


Posted in art information, weekly review | Tagged , , , , | Comments Off on Weekly Wrap is in The Can~July16 to July21, 2012

Get to Know The Oil Absorption of Your Paint

Lynn Burton: Indian Maiden (Oil on Canvas)

Oil paints are made by grinding pigments with a drying or semi-drying vegetable oil such as linseed, safflower or poppy seed oil. The oil binding medium is responsible for the appearance and buttery feel  of the paint. It also acts as an adhesive to attach the pigments to the painting surface.

Pigment particles do not have the same smooth shape or size. If they did then they would all need the same amount of oil to coat their surfaces. To reach a desired uniform consistency each pigment needs a specific amount of oil.

We discussed “fat-over-lean” in yesterdays blog. Paint with less oil content is not as flexible and if you paint it over a color with high oil absorption it could crack in time.

An artist painting with oil paint should understand and know the content of oil in their pigments. Here are some examples:

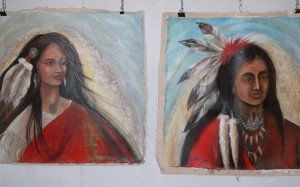
Lynn Burton: American Indians (Oil on Canvas)


High oil content (70%or more)

  • Burnt Sienna
  • Raw Sienna
  • Burnt Umber
  • Winsor Blue
  • Green Alzirin
  • Permanent Rose
  • Cobalt
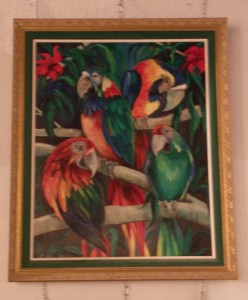
Lynn Burton: Parrots
Lynn Burton: Parrots (Oil on canvas)


Medium oil content: (50% to 70%)

  • Cadmium Yellow
  • Cadmium Red
  • Raw Umber
  • Oxide of Chromium
  • Ivory Black

Low Oil Content: (50% or less)

  • Ultramarine
  • Manganese Blue
  • Flake White

These are the pigments that belong in the particular categories listed. There may be others that belong in these categories. Check information when purchasing your paints.

Posted in art information, oil content, Oil Paint | Tagged , , , , , | Comments Off on Get to Know The Oil Absorption of Your Paint

Sticking To The Basics In Oil Painting

Lynn Burton: Chief and Skull (oil on Canvas)

The very basics in oil painting (call it oil painting 101 if you prefer) is a simple rule~“fat” over “lean”. Basically, what it says is that you should not cover a layer of paint with a less flexible layer.

  • Flexible: Oily-“fat”
  • Less Flexible: “Lean” (such as paint straight from the tube or diluted.)

You have probably cut into a cream pie where there is a skin formed on the top yet below it is soft pudding. Imagine the same with an oil painting. If the “lean” is layered over the “fat” it will create cracks on the surface over time.

To create “fatter” oil paint add an oil painting medium~(1) linseed oil, or (2) damar medium. To create “leaner” oil paint add (1) turpentine, or (2) mineral spirit.

Lynn Burton: Untitled
Lynn Burton: Untitled (oil on canvas)

They haven’t been time tested, but there is water miscible oils available. This is oil paint that mixes with water. Water substitutes for solvents used with oil paint. Working with these paints means you no longer have to deal with toxic solvents and you can clean your hands and brushes with soap and water. This is a plus for those of us who do not have a well ventilated studio.

Here are some other pluses for using water miscible oil paint:

  • They work like traditional oil paint
  • Has the same drying time
  • Bright pigmentation
  • Use water mixed with paint in the same quantity as turpentine or other solvents
Posted in Oil Paint, water miscible oil | Tagged , , , , , | Comments Off on Sticking To The Basics In Oil Painting

Why Is Oil Paint So Popular?

Lynn Burton: Untitled

Oil paint is a very versatile medium which can be manipulated in many ways. They dry slowly allowing them to be modified and moved around on the surface of the painting for a time after applying. After oil paints have dried, they can be painted over without disturbing the original color beneath. An artist can build up layers of paint and create different effects. These are just a few of the reasons why oil paint is so popular.

With the great many magnificent oil paintings that are hundreds of years old in museums, we know that if properly prepared, oil paintings last through the test of time. Some artists think of this as perhaps being discovered someday, even if it is a hundred years from now. They’d like to know their painting would still be around.

Oil paint can be used in different ways creating different textures. If used directly from the tube, it can be worked in a thick impasto style with bristle brushes or painting knives.

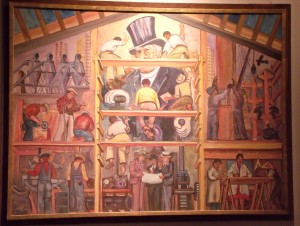
Lynn Burton: Study for Mural (oil on board)

Oil paints can be formulated creating a creamy consistency and even be  thinned down so much they can be applied to create an enamel like finish. When mixed with white spirit or turpentine it can be used as a glazing color modifying the appearance of the color beneath.

Bristle brushes can create dry brush and scumbled techniques. Soft hair brushes can manipulate the oil paint leaving a smooth surface. Many artists make their artistic statements with their type and style of brush strokes (think of Van Gogh).


Posted in Oil Paint, painting | Tagged , , , , | Comments Off on Why Is Oil Paint So Popular?

Warning Tips for Painting With Oil

Lynn Burton: "Adam and Eve"
Lynn Burton: “Adam and Eve”

Oil painting was not discovered by any one artist. It was first used as early as the 1200s and only for decorating purposes. It was not until the 1500s that it was used for easel paintings by artists. Since the 1600s it has been used continuously.

The traditional method of painting with oil requires the artist to mix the pigment with a vegetable oil such as linseed oil. The quantity of oil required to make a pigment brushable and smooth can vary from one pigment to another.

Warning Tips:

  • Pay attention to warnings on the labels of paints and solvents.
  • Remember that lead, cadmium cadmium, nickel or cobalt are poisonous.
  • If you get the poisonous chemicals on you skin, wash them away with soapy water-immediately.
    Lynn Burton: Parrots
    Lynn Burton: Parrots
    • Solvents are toxic and can drive diluted pigments into your pores-don’t use them to wash with.
    • Keep your brushes (handles as well) out of your mouth…duuh?
    • Make sure you do your painting in a well ventilated studio. Fumes affect the brain. If you have a tendency to cut off your ear, check your ventilation.
    • Wear a breathing mask when using spray varnishes.
    • Don’t smoke when using varnishes and solvents-they are a fire hazard-keep them in a well ventilated space.
    • Many  of the materials used in oil painting can irritate your skin. Be aware of this and wash with warm soap and water often while painting. You may prefer wearing protective gloves.

Be sure to sign up for Art Center Information’s newsletter (upper right). There will be a random selection of entrants and one will receive this beautiful (huge) art coffee table book>>>ART: Over 2,500 Works from Cave to Contemporary (Hardcover)~by Andrew Graham-Dixon (Author)


Posted in Oil Painting, Warning Tips | Tagged , , , , | Comments Off on Warning Tips for Painting With Oil

I Did it! And the Winner is…

For the many of you that entered to receive my newsletter and wanted a chance to receive the beautiful art coffee table book~The Louvre~all the paintings, please click below and see who will receive this beautiful book.

I wanted to announce this by YouTube… I have a Mac computer and had to do a lot of re-setting…but I think I got it….we’ll see.

If you will notice the upper right, I have announced a new gift that will be giving away in the future to one of you that signs up to receive my newsletter. This is a friendly incentive to try out my newsletter. Thank you.

If you would like to be interviewed as an artist and show your work on this blog sight, be sure to watch the YouTube video below and get in touch with personal message to me.

Click on the screen below>>>>


Posted in ART COFFEE TABLE BOOK | Tagged | Comments Off on I Did it! And the Winner is…

Weekly Recap for 07/09 to 07/14, 2012

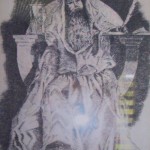
R.D.Burton"Old Man Time" (Graphite Drawing) Private Collector
R.D.Burton”Old Man Time” (Graphite Drawing) Private Collector

Please note: If you want to go directly to the article discussed, click on the picture to the right of the discussion.

On Monday, we said that an artist needs to work systematically to capture the particular characteristics of their subject, rather than applying their own artistic interpretation. We gave great tips here when writing the blog entitled: Tips for Graphite Drawing.


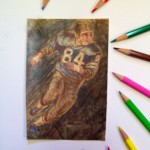
R.D.Burton #84~Display-Example of colored pencil drawing
R.D.Burton #84~Display-Example of colored pencil

On Tuesday, we said you can build up layers of crosshatching to produce an “optical mix” of color. This gives a visual effect which appears that the colors have blended. There are several colorful ideas for you in the blog post entitled, Tips to Draw with colored pencils.


Drawing study for “Old Woodie”: R. D. Burton


On Wednesday, we passed on great suggestions in blog post entitled, Five Tips that help Artist Make Preparatory Drawings. We said that In the distant past, drawings were primarily used as studies for later paintings. They were not the end itself but a means to an end. We know this by studying the many painting sketches of any of the masters going back into the middle ages and beyond.


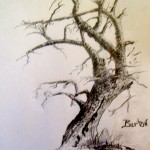
R. D. Burton: Knobby Tree (graphite on paper) 8"X11"
R. D. Burton: Knobby Tree (graphite on paper) 8″X11″

On Thursday, we wrote in the blog post entitled, Tip: Don’t Throw Away Graphite Sketches, to be sure you keep all your preliminary work–your sketches, graphite drawings, color workups, etc. You never know when someone wants them…even willing to pay for them.

It wasn’t in my plans, but the graphite sketch, Knobby Tree, sold but the watercolor with the same name never did. This was simply a preliminary work for the painting…you never know?


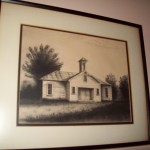
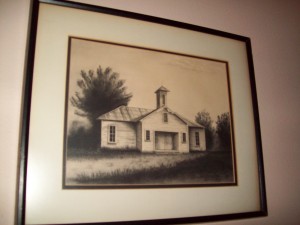
Artist, Jim Frederick "School House"
Artist, Jim Frederick “School House”

On Friday, we discussed different types of drawing paper for graphite pencil. I also discussed my late friend, James Frederick, who draw so many beautiful graphite drawings.

In the blog I passed along funny story James once told me. When he enrolled at the University of Texas as a student, he noticed that there was an art class with “live models.”  He being an “all American boy” thought…


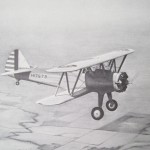
James Frederick: Stearman (graphite on paper) Smithsonian
James Frederick: Stearman (graphite on paper) Smithsonia


On Saturday, we pointed out how important it is for artist to capture the atmospheric perspective in their drawing details. Crisp dark lines should lighten to show the apparent diminution in the size of objects as they recede in the distance.

If you notice, the effect of distance and atmosphere has been carefully considered in James Frederick’s graphite pencil drawing, Stearman.


Posted in Graphite Drawing, weekly review | Tagged , , , | Comments Off on Weekly Recap for 07/09 to 07/14, 2012

Graphite Pencil Drawing: Atmospheric Perspective

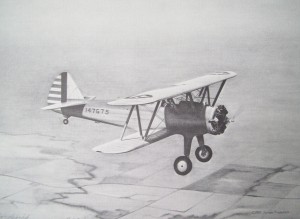
James Frederick: Stearman (graphite on paper) Smithsonian

If you notice, the effect of distance and atmosphere has been carefully considered in James Frederick’s graphite pencil drawing, Stearman.

It is very important to artist to capture the atmospheric perspective in their drawing details. Crisp dark lines should lighten to show the apparent diminution in the size of objects as they recede in the distance.

The plane is the focal point of the drawing, but if you will note the artist showed the ground below to the right of the picture at a darker value and lightened his strokes to the left of the painting. This would be the depiction from the point of the viewers eye which is raised and to the right. By doing this Mr. Frederick gives the sense that the plane is flying and the ground to the left is disappearing out of the drawing. These are very important details that an artist needs to be aware of and keep in mind when he is drawing.

Posted in drawing, Graphite Pencil | Tagged , , , | Comments Off on Graphite Pencil Drawing: Atmospheric Perspective

Suggested Drawing Surfaces for Graphite Pencil

Artist, James Frederick "School House"
Artist, James Frederick “School House”

There are several papers suitable for graphite drawing paper. There are those listed as drawing paper, watercolor, pastel or charcoal paper.

Listed below are some suggestions that are acid-free drawing papers.

James Frederick: "2nd Amendment"
James Frederick: “2nd Amendment”


  • Strathmore 500-series Drawing
  • Strathmore 500-series Bristol
  • Morilla Bristol
  • Fabriano 5
  • Fabriano Artistico
Artist: James Frederick: "Texas Barn"  (Graphite on paper)
Artist: James Frederick : “Texas Barn” (Graphite on paper)
James Frederick: "Poppin Johnny" (Graphite on paper)
Jams Frederick: “Poppin’ Johnny”(Graphite on paper)


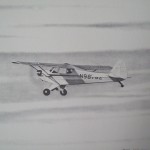
James Frederick: J-3 Piper Cub (Graphite pencil on paper) Smithsonian
James Frederick: Stearman (graphite on paper) Smithsonian

The pictures on this page are from the collection of Texas Artist, James Frederick. We lost James last month and I was always proud to have him as an extended family member (my daughter’s father-in-law).

James once told a funny story about art, and I’m sure he won’t mind me passing it on to you. When he enrolled at the University of Texas as a student, he noticed that there was an art class with “live models”.

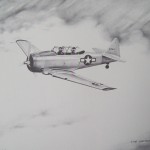
James Frederick: AT-6 (Texan) (Graphite on paper) Smithsonian
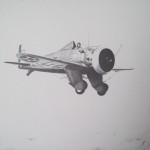
P26A(Peashooter) (Graphite Pencil on paper) Smithsonian
P26A(Peashooter) (Graphite on paper) Smithsonian

James, being “all American boy”, thought, “H-m-m-m” and envisioned himself painting beautiful co-ed models. Whoops!...Not to be. He spent the whole semester drawing and painting hands of male models. Of course, this became a great discipline for future works as you can see how good he is at depicting hands in The List, below.


Artist: James Frederick: "The List" (Graphite on paper)
James Frederick “The List” (Graphite on paper)


Posted in Drawing Surface, Graphite Pencil | Tagged , , , , , | Comments Off on Suggested Drawing Surfaces for Graphite Pencil